Why Does an NC Servo Feeder Slip as the Coil Empties?
Three weeks ago a customer sent me a video of a 1,200 mm line running 1.2 mm SPCC. The first 400 strokes of every coil were perfect. By the last third the strip was arriving at the die 0.8 mm short, and the operator had learned to slow the press down to compensate. Nothing had been changed, nothing had worn out, and the same thing happened on the next coil.
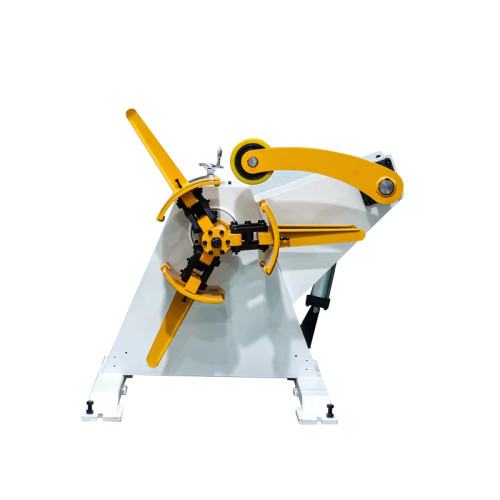
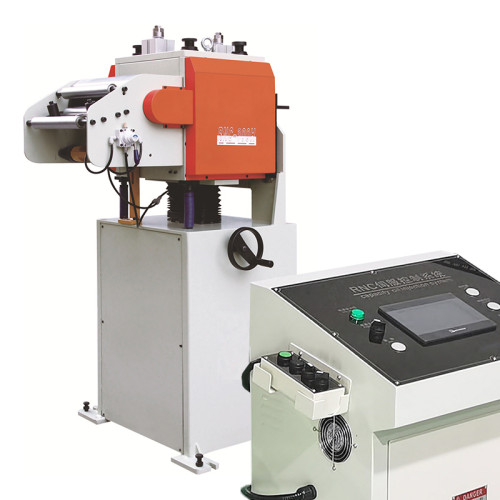
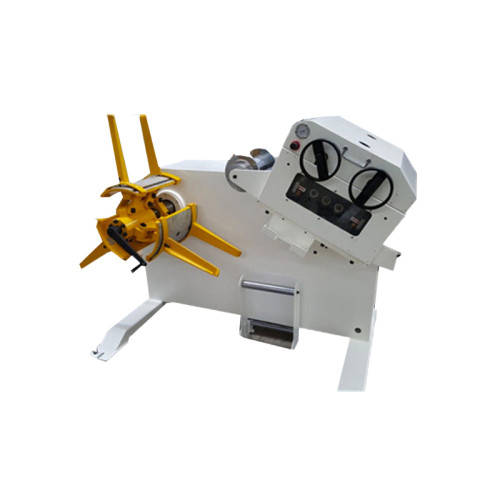
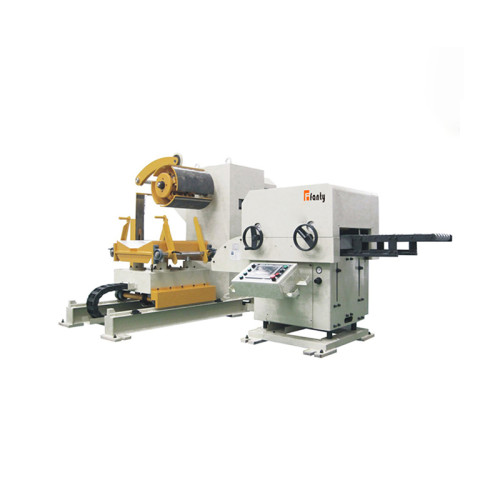
That pattern — clean at full coil, drifting as the coil pays down — has a specific set of causes, and none of them is the NC servo feeder losing torque. The feeder is doing exactly what it was told; the load on it is rising. This article walks through why the load rises, how to measure it with instruments you probably already own, and which fixes actually hold. The feed roll and brake specifications behind the numbers are listed in the product range.
The Pattern, and Why It Is Easy to Misread
Slipping that appears only in the last third of a coil looks like a wear problem. The instinct is to raise roll pressure, and on many lines that appears to work — for a week, until the roll surface polishes and the problem returns worse than before.
What actually changes through a coil is the geometry. The outer diameter falls from around 1,250 mm to perhaps 700 mm, which means two things happen simultaneously: the torque needed to hold a given strip tension falls with radius, but if the brake is set to a fixed torque, the tension the strip actually sees rises. And the decoiler must turn faster and faster for the same strip speed, because surface speed is angular velocity times radius.
Both effects push in the same direction. The feeder ends up pulling harder against a brake that is, in effect, getting stiffer.
Two Mechanisms That Both Get Worse as the Coil Empties
Take a concrete coil: 1,200 mm wide, 1.2 mm SPCC, outer diameter 1,250 mm, bore 508 mm, weight about 9.6 tonnes, with the decoiler brake set to a fixed 2,600 N·m.
The back tension force the strip must overcome is the brake torque divided by the coil radius. At full coil the radius is 0.625 m, so the pull is 2,600 ÷ 0.625, or about 4,160 N. At an outer diameter of 900 mm the radius is 0.45 m and the pull is 5,780 N. At 700 mm outer diameter the radius is 0.35 m and the pull reaches 7,430 N. The same brake setting demands 79% more pull from the feeder at the tail than it did at the start.
The second mechanism is speed. Strip speed equals angular velocity times radius. To run 1.2 mm strip at 45 m/min, a 1,250 mm coil turns at about 11.5 rpm. The same coil at 700 mm outer diameter has to turn at 20.5 rpm. If the decoiler drive or the loop control cannot follow that rise, the loop shortens, and eventually the loop disappears altogether and the feeder is pulling directly against the brake instead of pulling from a slack loop. The moment the loop collapses, the feeder inherits the full back tension it was never sized to carry.
This is why the problem appears as a gradual drift rather than a sudden failure, and why it resets the moment a new coil goes on.
Four Causes, and How to Tell Them Apart
When a line behaves this way, these four are where I start. They produce almost identical symptoms on the parts, so the discriminator is what happens when you change one variable.
| Cause | What you see | Quick test |
|---|---|---|
| Fixed-torque brake with no tension taper | Slipping starts at a repeatable coil diameter, every coil | Note the outer diameter when drift begins. If it is consistent, the brake curve is the cause |
| Loop collapsed because the decoiler cannot keep up | Slip correlates with press speed, not with coil diameter | Run at 60% speed for a full coil. If the drift disappears, it is a speed or loop problem |
| Roll pressure set to the minimum that held at full coil | Margin was always thin; nothing has changed except the load | Raise roll pressure by 15% and re-run one coil. If the drift moves later in the coil, the margin was the issue |
| Low friction on the roll surface | Slipping worse after a roll clean, worse on oily or coated stock | Measure the strip surface with a friction slide test, or simply compare bare versus oily stock |
The first two are control problems and the last two are grip problems, and they need opposite responses. Raising roll pressure on a brake-control problem burns the roll surface without fixing anything. Adjusting the brake on a friction problem leaves you with a feeder that still cannot hold position on the next oily coil.
If you are unsure which one you have, the speed test in row two is the cheapest discriminator. Ten minutes at reduced speed on one coil tells you more than a week of guessing.
Three questions come up whenever I explain this to a maintenance team, and the answers save a lot of unnecessary roll changes.
Why does it only happen on some coils?
Because the trigger is a ratio, not an absolute. A coil with a larger outer diameter has more radius to work with at the tail, so the tension rise is smaller. A coil that is wound tighter, or one with a slightly heavier strip, crosses the threshold sooner. Two coils of the same nominal size from different mills can behave completely differently if one is 40 mm larger in outer diameter.
Should I just increase roll pressure?
Only if the speed test shows the drift does not change with press speed. Increasing pressure raises available grip roughly in proportion, which buys margin, but it also accelerates roll wear and on coated stock it marks the surface. Treat it as a temporary measure while you fix the brake curve, not as the fix.
Can the servo drive tell me it is slipping?
Indirectly. On most NC servo feeders the drive reports following error, which is the gap between commanded and actual position. A following error that grows through the coil, then resets on the next coil, is a reliable signature of rising load rather than a mechanical fault. Log it and you have a free diagnostic channel you are probably not using.
Is the loop arm or the dancer the problem?
Sometimes. A dancer with a heavy counterweight behaves like a constant-tension device and hides the problem; a loop with a light arm responds faster but has less damping. If your line has a dancer, check that the counterweight has not been increased by someone chasing a different problem — that change alone can create the slip you are seeing.
Measuring It With What You Already Have
You do not need a torque transducer to prove this. Three measurements are enough, and two of them are free.
The following error trend. Pull the drive's following error from the controller and plot it against coil diameter. If the two correlate, the load is rising. This takes one coil and no hardware.
Loop height or dancer position. Watch the loop through a full coil at constant press speed. A loop that starts at mid-height and steadily drops toward the minimum is telling you the decoiler is falling behind. If it stays level until the last 15% and then collapses, the cause is the speed ceiling rather than the tension rise.
A strip tension reading. If you have a load cell anywhere in the line, read it at full coil, at half coil and at the tail. A rise in the region of 70–80% matches the calculation above and confirms the brake curve. If tension is flat and slip still appears, the problem is grip and you should be looking at roll pressure and surface condition.
Write the three readings into the same log as the roll pressure and the hydraulic gauge reading. Six weeks of that log will tell you more about your line than any single test, because the correlation between coil diameter and drift is the whole story.
Fixes That Hold
- Taper the brake torque with coil diameter. On a hydraulic brake this means reducing pressure as the coil pays down, either by a proportional valve driven from the coil diameter calculation or by a preset multi-step curve in the control. This is the correct fix and it removes the tension rise at its source.
- Raise the decoiler speed ceiling. If the loop collapses on speed rather than tension, the answer is a faster decoiler drive or a larger loop capacity. Adding loop length is often cheaper than replacing the drive and buys enough time for the control to react.
- Set roll pressure from the calculation, not from the last job. Work out the available pull: total normal force times the friction coefficient. A feeder with 30 kN of roll force and a friction coefficient of 0.15 can pull about 4,500 N. Against the 7,430 N demand at the tail of the coil in our example, that is a 40% shortfall — which is exactly the point where the drift starts.
- Use a roll coating that holds its friction. Polyurethane at 60–70 Shore A keeps a higher coefficient on oily strip than polished steel, and it does not polish further with use. This raises the whole curve rather than just the top end of it.
- Keep a genuine loop, not a token one. A loop that holds 200 mm of slack has almost no reserve. Sizing the loop so that it can absorb 1.5 seconds of strip at full speed gives the decoiler control time to react, and the feeder never sees the brake directly.
Of those five, the first is the one that fixes the root cause and the third is the one that buys time today. If you can only do one thing this month, do the third — it costs nothing and it will tell you within one coil whether you have a grip problem or a control problem.
What Not to Do
Three responses make this worse, and all three are common.
Do not tighten the roll springs to the maximum and leave them there. Roll pressure beyond what the calculation requires flattens the strip, marks coated stock, and accelerates bearing and cam wear. On a line running 24 hours, an over-pressured roll pair will need replacing inside a year.
Do not reduce press speed permanently. Slowing the press to 70% hides the symptom and costs you 30% of your output on every job, including the ones that never had a problem. Use the speed test as a diagnostic, not as a production setting.
Do not add weight to the dancer arm. A heavier dancer looks like it stabilises the loop, and it does — by pulling harder on the strip, which increases the load on the feed rolls and moves the slip point earlier in the coil. If someone has already done this, put it back before you change anything else.
Deciding Whether It Is the Feeder or the Decoiler
After the tests, the decision usually comes down to one question: does the drift follow the coil diameter or the press speed?
If it follows coil diameter — same diameter every time, regardless of speed — the brake curve is wrong and the decoiler control is the fix. If it follows press speed — appears earlier at higher speeds, disappears at low speed — the loop is collapsing and the decoiler drive or the loop sizing is the fix. If it follows neither and the drift is random through the coil, you have a grip problem on the feed rolls, and roll condition, pressure and surface are where to look.
The one case that genuinely implicates the feeder is when the available pull from the feed rolls is below the load at full coil, not just at the tail. That shows up as drift from the very first stroke, and it means the feeder was undersized or the roll surface has degraded to the point where it can no longer hold the job. FANTY builds feed rolls to hold ±0.05 mm at 200 strokes per minute on 1.2 mm SPCC, and 80 engineers on staff spend a lot of their time on exactly this boundary — where the machine stops holding the job it was sold to do.
Before you call it a feeder problem, run the three measurements. In my experience roughly seven out of ten lines that report "the feeder is slipping" turn out to have a brake or loop issue, and the feeder was the messenger rather than the cause.
Slip That Starts Mid-Coil? Send Us the Numbers
Give us your coil outer diameter range, brake torque setting, roll pressure and the press speed at which the drift starts. We will tell you which of the two mechanisms is at work and what to change first.
Send Us Your Line Data