How to Prove Flatness on an NC Straightener Feeder?
Two setters can measure the same strip and disagree by a factor of three, and both will be honest. One laid a straightedge on the concave side and called it flat.
The other measured at the quarter points and found a 1.6 mm bow.
This is a procedure for proving flatness on an NC straightener feeder.
It covers which defect you are actually measuring, which instrument detects it, the six checks to run after a gauge change, and where the whole exercise proves nothing at all.

Flatness is not one property. It is a family of defects that all look like "the strip is not flat" and all have different causes in the roll stack.
Measure the wrong one and you will adjust the wrong roll. That is how a line ends up with perfect bow and terrible twist.
Decide Which Flatness You Are Actually Measuring
Name the defect before you reach for an instrument. Four of them cover almost every flatness complaint on a press line.
- Longitudinal bow. The strip rises or falls along its length like a shallow arc. Caused by the roll stack bending the strip in one direction more than the other.
- Crossbow. The strip is curved across its width, like a shallow channel. Comes from roll crown, roll wear or uneven roll gap side to side.
- Twist. One edge lifts when the other is held down. Usually points at a roll that is not parallel to its partner.
- Edge wave and centre buckle. The strip lies flat but ripples because one zone is longer than its neighbour. This is a roll gap and penetration problem, not a bend problem.
Bow and crossbow are measured against a reference line. Wave is measured as an elongation difference. They need different tools and different corrections.
Pick the Instrument Before the Setting
Every method below is legitimate. None of them detects everything, and the cheapest one is the easiest to misread.
| Method | What It Detects | Where It Misleads You |
|---|---|---|
| 1 m straightedge on the strip | Longitudinal bow, roughly | Shows nothing about twist, and reads differently depending on which face and which side you lay it on |
| Feeler gauge under the straightedge | Bow to within 0.05 mm at one point | Only measures the gap where you insert it. Edge wave hides underneath the blade |
| Dial indicator on a surface plate | Crossbow across the width, and repeatability | Needs a cut sample, so it measures the strip after it has relaxed, not as it runs |
| Twist check by lifting one edge | Twist, as a corner gap | Depends on how hard you hold the opposite edge. Two operators will differ |
| Laser flatness scanner inline | Wave and buckle in real time at speed | Costly, and it measures the strip as tensioned on the line, which is not how it sits in the die |
For most press shops the practical pairing is a straightedge plus a feeler gauge for bow, and a cut sample on a plate for crossbow. Add a twist check by hand.
The Six-Step Check After a Gauge Change
Run this sequence every time the line changes material thickness. It takes about twelve minutes and prevents most of the scrap that follows a changeover.
- One. Confirm the strip is at temperature and has relaxed. A sample cut straight off the coil still carries residual stress and will bow as it cools.
- Two. Cut three samples from the same coil, one from the outer wrap, one from mid-coil and one from near the eye. Flatness varies along a coil.
- Three. Lay the straightedge on the concave face and measure the gap at the centre and at both quarter points, not just at the middle.
- Four. Check twist by holding one edge flat and measuring how far the opposite corner lifts off the plate.
- Five. Look at the strip for wave before you cut it. Edge wave is obvious on the running strip and invisible in a relaxed sample.
- Six. Record the number and the setting together. A flatness figure without the roll setting beside it cannot be reproduced next month.
Reading a Straightedge Result Without Fooling Yourself
The same 1.6 mm reading means different things depending on where you took it. Use the table below as a first filter before touching a roll.
| Reading | Most Likely Cause | Where It Costs You |
|---|---|---|
| Bow at centre only, both edges clean | Even penetration, but not enough of it | Adding penetration removes the bow and can introduce edge wave on thin strip |
| Bow plus centre buckle | Roll gap too tight in the middle, so the centre is stretched | Correcting the gap costs a setup, and the roll crown may already be worn |
| Bow plus edge wave | Roll gap too tight at the edges, usually after a roll change | The obvious fix, more penetration, makes the wave worse |
| Twist with no bow | A roll not parallel to its partner | Needs a mechanical alignment, not a setting change. Ignoring it wears the roll ends |
| Flat on the plate, wavy on the line | Tension or pass line height, not the straightener | Adjusting rolls to fix a line problem moves the defect rather than removing it |
The last row causes more wasted setup time than any other. If the sample is flat on a plate and the running strip is not, the roll stack is not the problem.
How many samples should you cut to prove flatness on a 1,200 mm coil?
Three, taken from the outer wrap, mid-coil and near the eye. Flatness typically varies more along a single coil than between two coils from the same mill.
What bow figure is acceptable on a visible panel at 1.5 mm?
Around 2 mm per metre is a common limit for a painted visible panel, and 3-4 mm per metre is often acceptable for hidden structural parts. Agree the figure with your customer before the run.
Does a 5-roll head flatten 3 mm strip as well as a 7-roll head?
On 3 mm the difference is usually small once penetration is set correctly. The gap widens below 1 mm, where a 7-roll head removes wave with less penetration and less risk of over-bending.
How much twist is too much on a 300 mm wide strip?
More than about 0.5 mm of corner lift over a 1 m sample is worth correcting. Below that, most dies absorb it without a measurable effect on part flatness.
Where a Flatness Check Proves Nothing
A clean flatness reading is a necessary result, not a sufficient one. Three situations make it meaningless.
When the defect only appears in the die. A strip that is flat on the plate can still produce a bowed part if the die's own springback or the pilot release timing adds the bow. The straightener was never the cause.
When you measure after the coil has relaxed. A sample left on a bench overnight tells you about the material, not about what the line delivered at 200 strokes per minute.
When the material is coated. On pre-painted or galvanized strip, reducing penetration to protect the coating will leave measurable bow.
There is a genuine trade-off between surface integrity and flatness, and the customer has to choose which one they are buying.
Also be careful with the reverse claim. A line that produces flat strip at 1.0 mm will not necessarily produce flat strip at 2.5 mm HSLA 420 with the same roll settings, because the load case changes.
Flatness is a setting for a material, not a property of the machine.
Recording the Result So It Means Something Next Month
Flatness data decays fast if it is not stored with its settings. Four fields make a record reusable.
Material, thickness and width. Without these the number describes nothing. SPCC at 1.0 mm and SPHC at 2.0 mm are different problems.
Roll setting, including penetration and roll gap, written as numbers rather than "two turns from the mark".
Sample position in the coil. Outer wrap, mid-coil or near the eye, since the reading depends on it.
Instrument used. A straightedge reading and a laser scanner reading are not interchangeable, and mixing them across a log creates false trends.
Machines built in a 45,000 m² plant and shipped to more than 60 countries arrive with a commissioning sheet covering these four fields, and our machines ship with it as standard.
Keeping it current is what turns a one-off acceptance test into a line that stays flat.
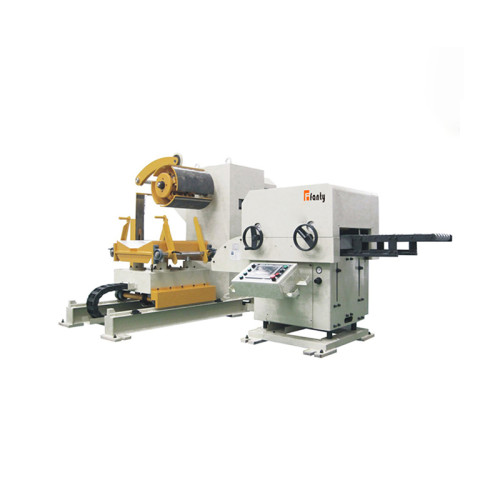
The 3-in-1 decoiler straightener feeder pillar sets out how roll count, pitch, gap and penetration produce the flatness you are measuring.
Where to go next
This article sits in the flatness branch of the coil line guide library, one layer below the roll geometry pillar. It covers how to prove a flatness result rather than how to set the rolls that produce it.
Read the flatness specification guide